

Basic Canning Instructions
This basic canning tutorial will equip you with an essential food preservation skill to add to your DIY toolkit. Use your favorite vegetables, spices, pickle recipes and techniques to create your own favorite blends at home. Canning in clear glass jars is the perfect way to enjoy homegrown vegetables all year round that were picked at their peak ripeness in the summertime.
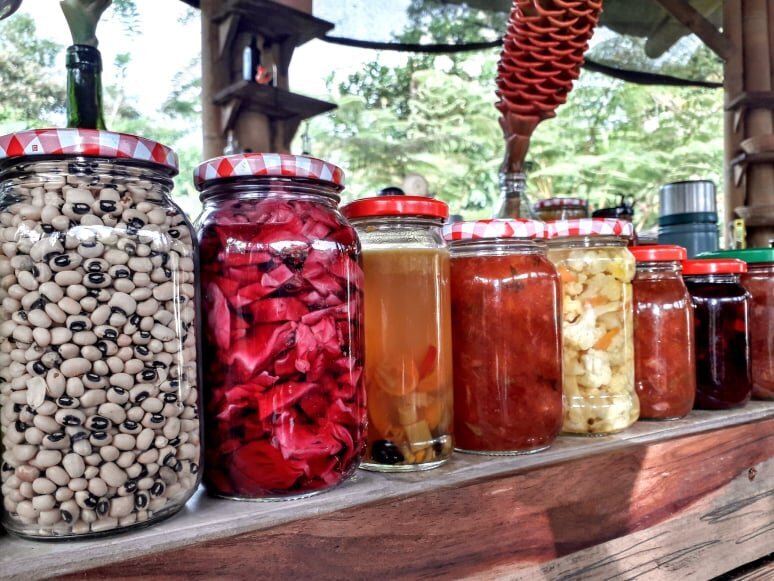
Canning Instructions
Make sure your jars and lids are clean and in perfect condition (no nicks or cracks.
Sterilize the jars and lids: Fill a large pot of water and place the jars and lids in the water. Bring the water and jars slowly up to a boil. Boil for two minutes, then lower to simmer and put a lid on the pot to keep the jars hot.
To keep everything hot and sterile, I pack my jars one at a time. Carefully, lift a jar from the hot water with tongs, drain the hot water back into the pot, and place the jar on the counter.
Pack the jar loosely with the vegetables to be pickled. Leave half an inch of headspace at the top.
Pour the hot vinegar pickle mix into the jar over the cabbage. Leave half an inch of headspace at the top.
Carefully lift a hot lid from the hot water, and with a towel or kitchen mitt, tighten the lid onto the jar.
Wipe any spills dribbles off the packed jar and place it gently back in the hot water.
Repeat steps 1 through 5 until all your jars are packed and in the pot.
Make sure the jars are submerged at least an inch below the level of the water. If not, add more water or use a bigger pot if necessary!
Bring the water back up to a boil with the jars submerged. Gently nudge them apart with a wooden spoon if they clink against each other. *If you start doing large canning projects, you can invest in a canning rack.
Boil the jars for at least ten minutes. You will see bubbles escaping from under the lids--that is the air being forced from the jars which is what creates the seal to preserve the contents. Higher altitudes require a longer boiling time. Check the internet for the correct processing time for where you live. (Simply Google “water bath canning altitude.”)
Once the jars have boiled for the required time, turn off the heat and let the jars sit in the water for 5-10 minutes to cool down. If you lift them out right away, the abrupt change in temperature can crack the jars.
Ok, congratulations! Lift out your jars and admire them in the light. They are beautiful! Stored in a cool, dark place, they will keep for at least 9 months.

Kristen Krash is the co-founder and director of Sueño de Vida, a regenerative cacao farm and reforestation mission in Ecuador. Sueño de Vida works to educate and inspire everyday people about permaculture, sustainable living, environmental activism and healthy living all in the name of living more in harmony with nature to create a better world for us all.
You can support the Sueño de Vida mission today by purchasing our cacao or contributing to direct reforestation.
Thank you.